Get started with Java and Spring
Part I. Maven
You can find all the sources for this chapter here
This article series is designed mostly for computer engineers with non-Java/Spring programming background who want to get started with new technology fast and flawlessly.
Though it doesn’t cover most valuable principles of development, migrating and deployment, it can be used as good introductory view on new technology.
I won’t explain every step of this guide deeply but will try to serve you with valuable links where you would get much more useful information.
- Bootstrap a new modular project with Maven ← this article
- Read and write data. Interact with YouTube API
Throughout our journey we’ll build a simple Tube application which will crawl some videos from YouTube and present it on our website.
Introduction
Apache Maven is not just a dependency manager (like PHP’s Composer is) but a full stack project management solution which helps you to bootstrap your application using all the dependencies needed, build it and deploy.
Action
Creating a project
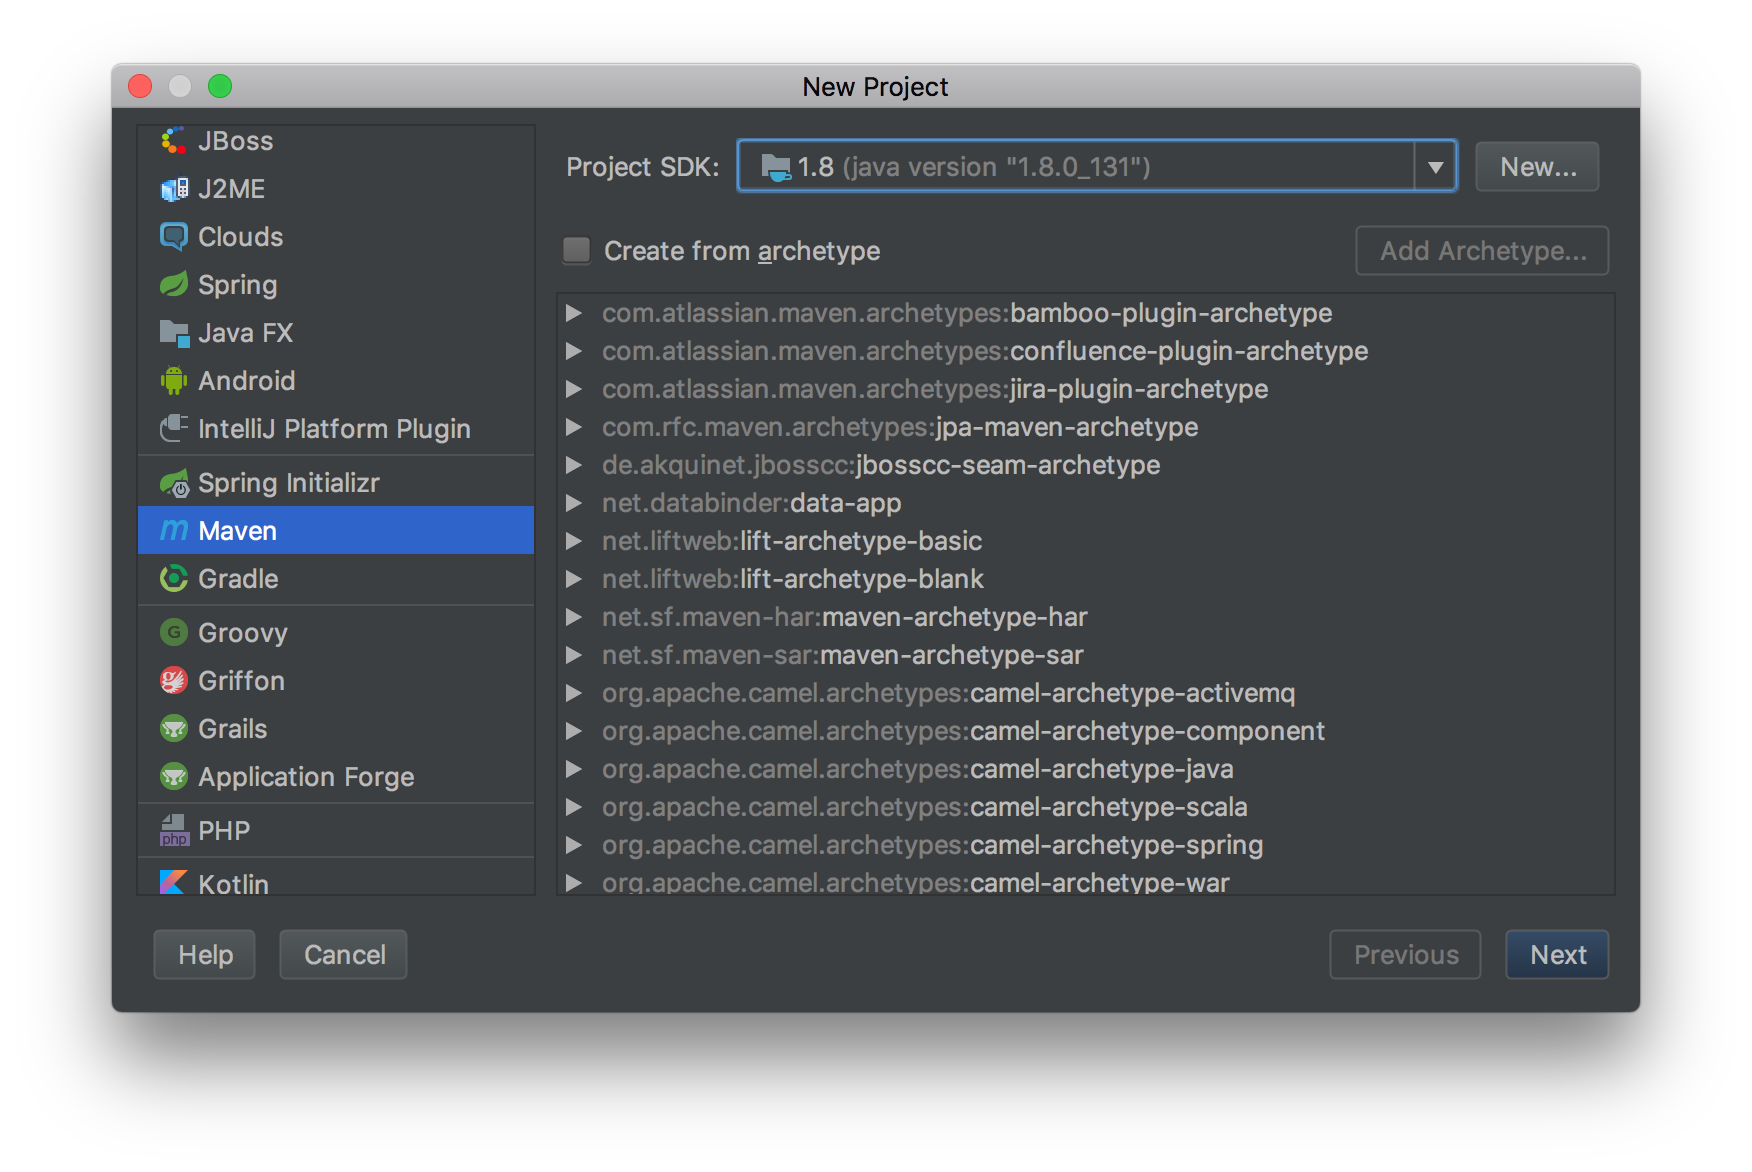
Let’s start with creating a new Maven project with File → New → Project…
Find and select project category Maven and choose your project SDK (for now it’s 1.8). If you haven’t any then you need to install JDK e.g. from Oracle official website.
For now we won’t create our application from any
archetype. Click Next.
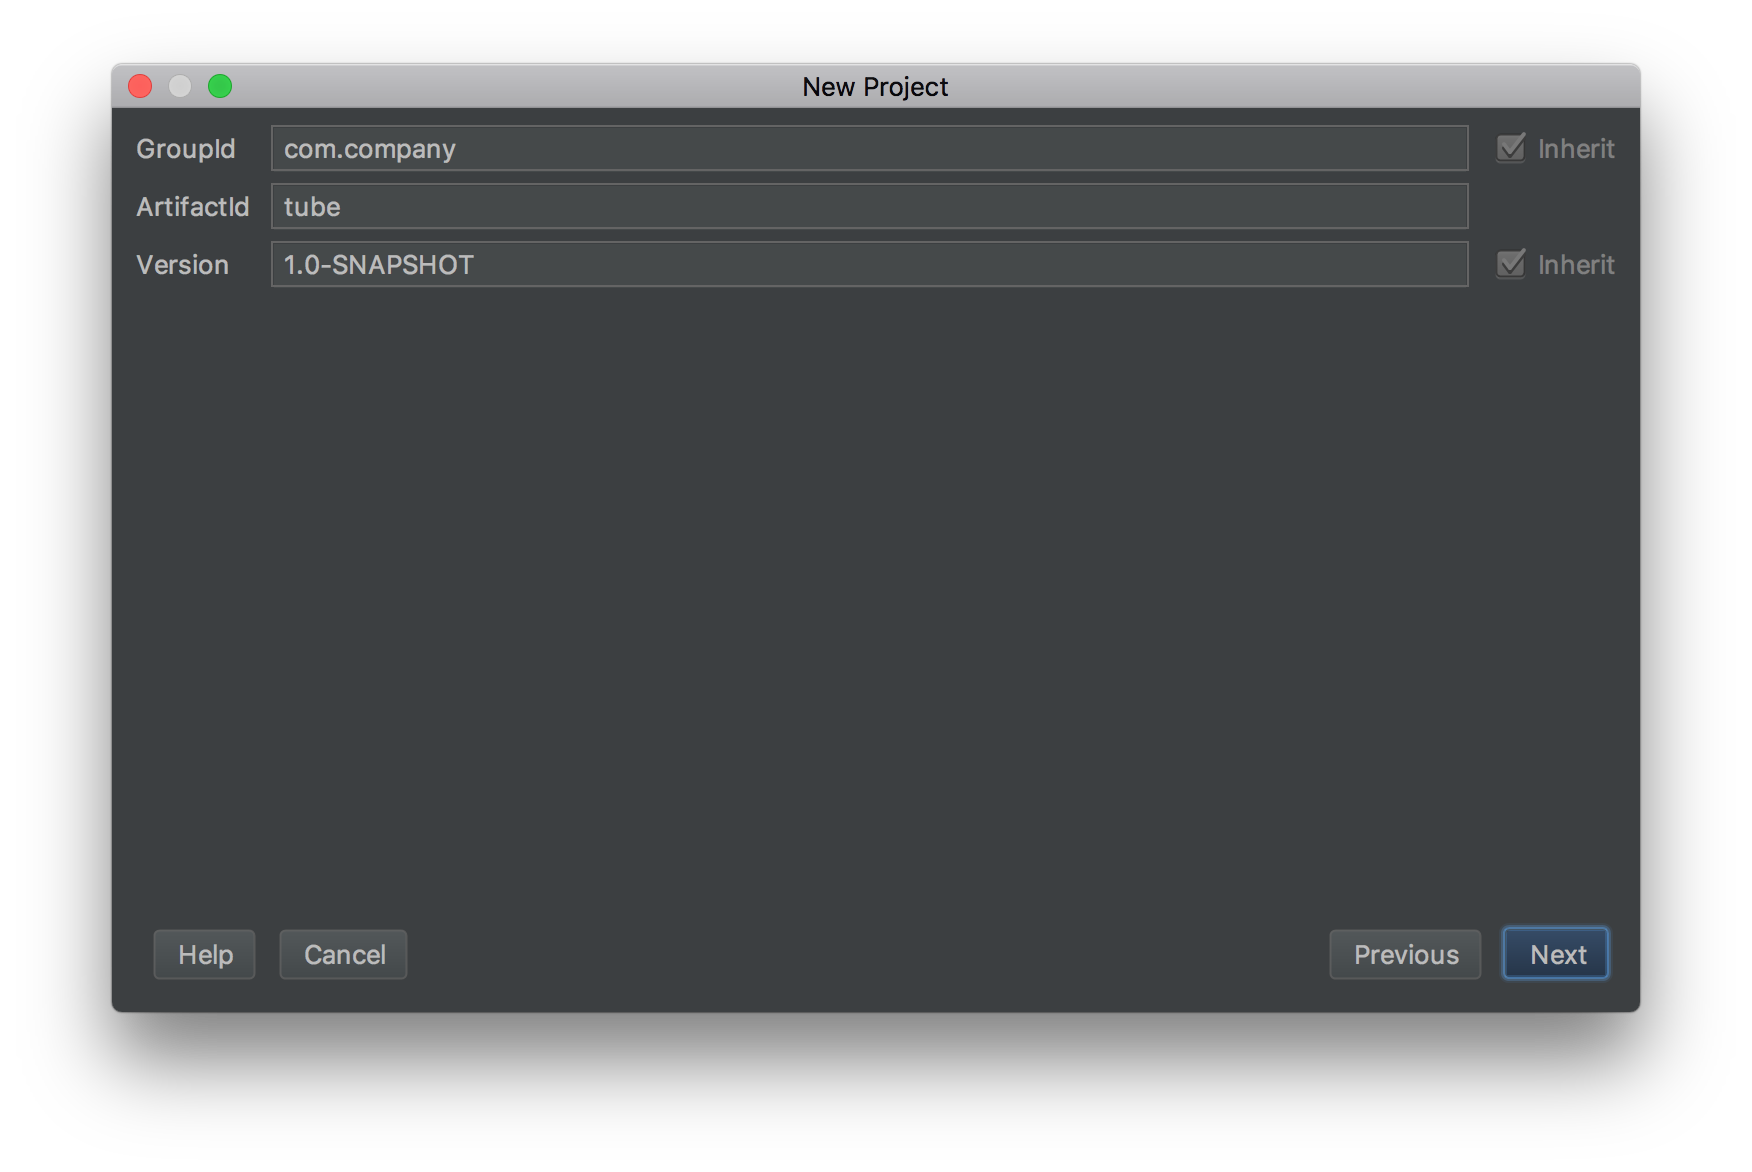
Now we need to enter our company name (called GroupId) e.g. com.company and application name (called ArtifactId) e.g.
tube. We’ll leave the version as it is.
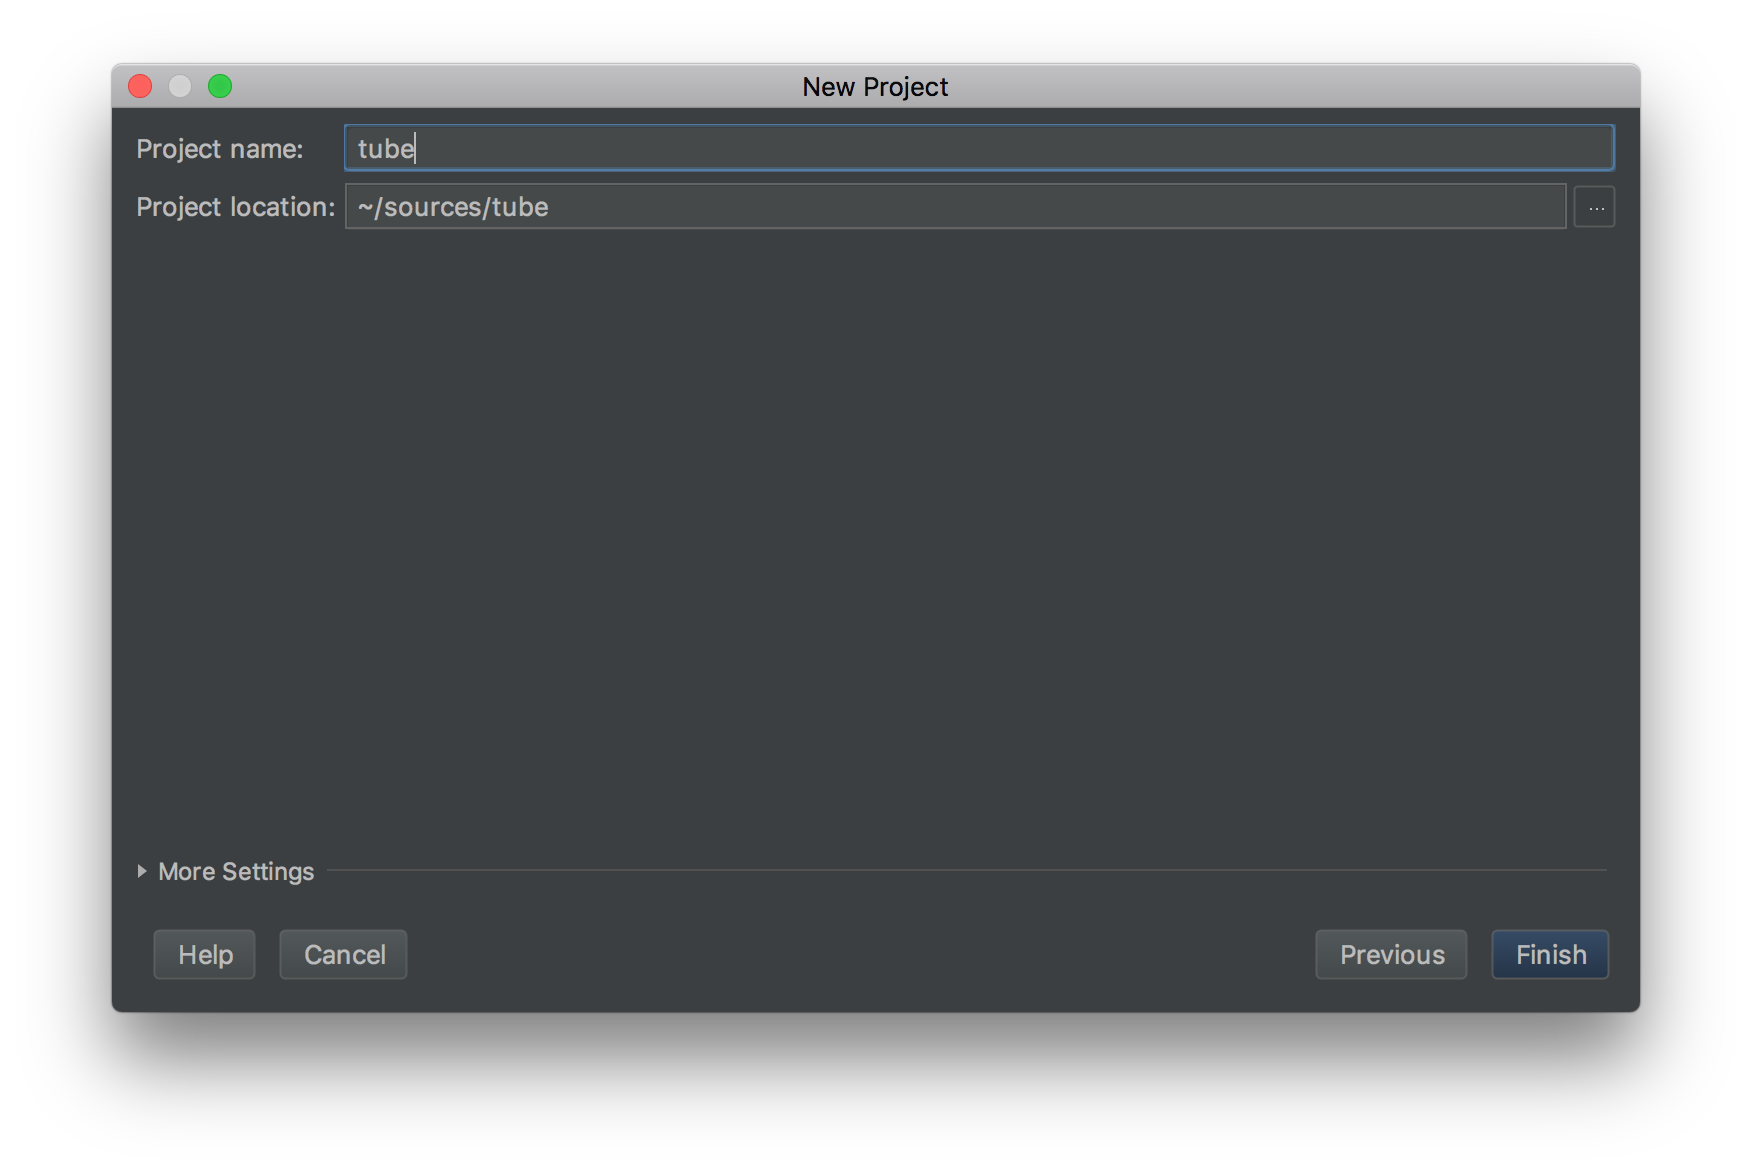
Then we choose the location of our project and finally we can start.
Working with Maven
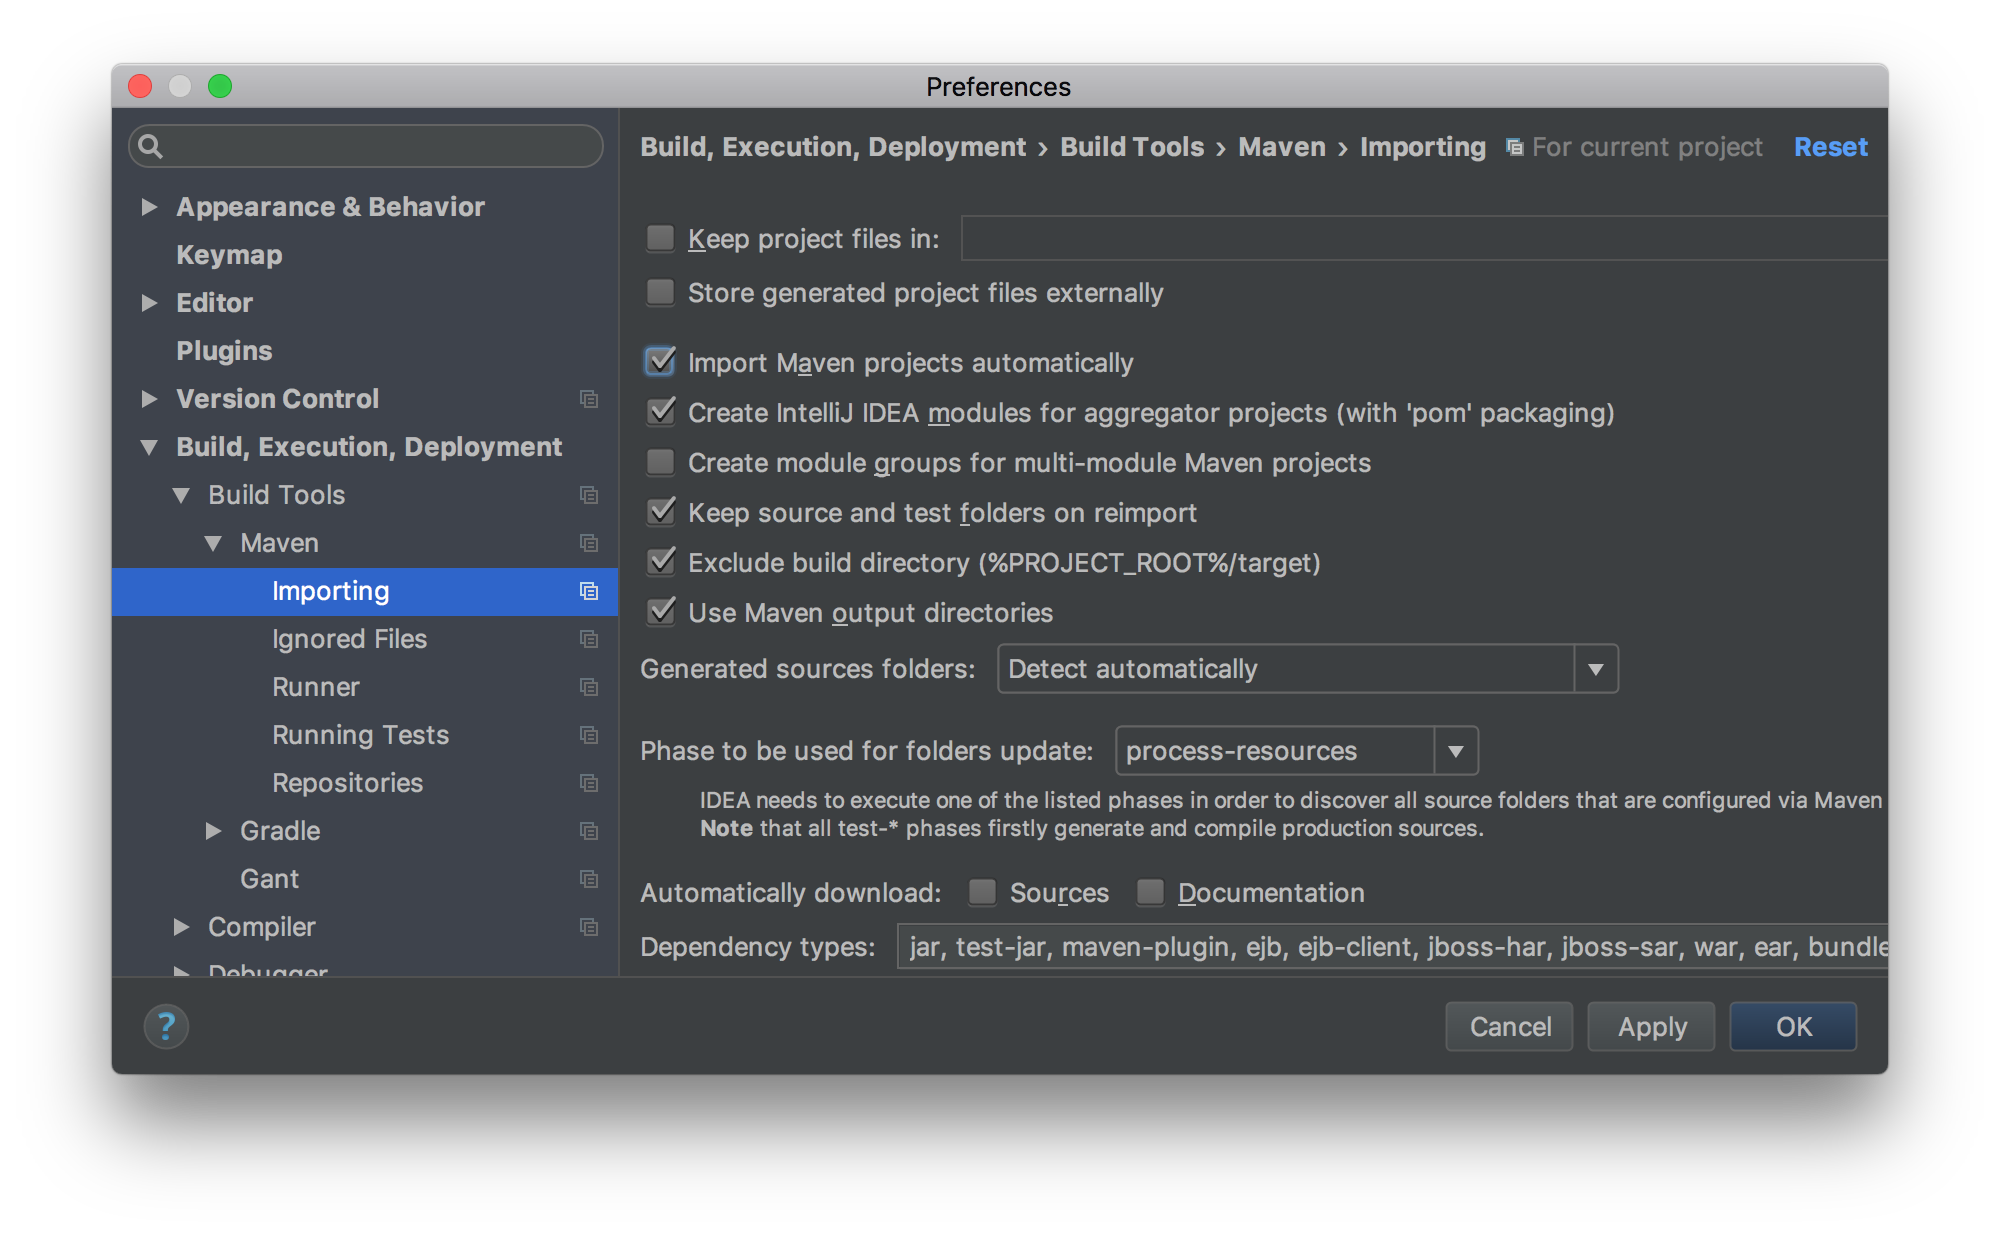
After the project creation you’ll be asked to Auto-Import all the Maven dependencies.
I prefer to do this, because if you do so then you won’t need to reimport projects manually after any dependency updates in your POM file.
You can enable Auto-Import later in IntelliJ IDEA Preferences: Build, Execution, Deployment → Build Tools → Maven →
Importing and checking the Import Maven projects automatically box.
We’ll start with three submodules in our project:
Library- the main entity and repository storage.Presenter- our web frontend.Scheduler- the data handler.
Now we have to write modules definition (under <modules> section) in our root pom.xml:
1
2
3
4
5
6
7
8
9
10
11
12
13
14
15
16
17
<?xml version="1.0" encoding="UTF-8"?>
<project xmlns="http://maven.apache.org/POM/4.0.0"
         xmlns:xsi="http://www.w3.org/2001/XMLSchema-instance"
         xsi:schemaLocation="http://maven.apache.org/POM/4.0.0 http://maven.apache.org/xsd/maven-4.0.0.xsd">
    <modelVersion>4.0.0</modelVersion>

    <groupId>com.company</groupId>
    <artifactId>tube</artifactId>
    <version>1.0-SNAPSHOT</version>
    <packaging>pom</packaging>

    <modules>
        <module>library</module>
        <module>presenter</module>
        <module>scheduler</module>
    </modules>
</project>
Then we can bootstrap all our modules using IntelliJ IDEA’s intentions.
Choose Create Module with parent to share all the common dependencies and plugins between the modules by defining
a parent.
Or you can create all the directory structure by yourself:
.
├── library
| ├── src
| | └── main
| | └── java
| └── pom.xml
├── presenter
| ├── src
| | └── main
| | ├── java
| | └── resources
| └── pom.xml
└── scheduler
├── src
| └── main
| ├── java
| └── resources
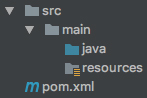
└── pom.xmlBe sure to mark all src/main/java directories as Sources Root (call context menu on java directory and select
Mark Directory as → Sources Root) and all src/main/resources as Resources Root respectively.
Then we’ll be able to define our modules’ pom.xml files.
./library/pom.xml
1
2
3
4
5
6
7
8
9
10
11
12
13
14
15
16
17
<?xml version="1.0" encoding="UTF-8"?>
<project xmlns="http://maven.apache.org/POM/4.0.0"
         xmlns:xsi="http://www.w3.org/2001/XMLSchema-instance"
         xsi:schemaLocation="http://maven.apache.org/POM/4.0.0 http://maven.apache.org/xsd/maven-4.0.0.xsd">
    <modelVersion>4.0.0</modelVersion>

    <parent>
        <groupId>com.company</groupId>
        <artifactId>tube</artifactId>
        <version>1.0-SNAPSHOT</version>
    </parent>

    <groupId>com.company</groupId>
    <artifactId>library</artifactId>
    <version>1.0-SNAPSHOT</version>
    <packaging>jar</packaging>
</project>
./presenter/pom.xml
1
2
3
4
5
6
7
8
9
10
11
12
13
14
15
16
17
<?xml version="1.0" encoding="UTF-8"?>
<project xmlns="http://maven.apache.org/POM/4.0.0"
         xmlns:xsi="http://www.w3.org/2001/XMLSchema-instance"
         xsi:schemaLocation="http://maven.apache.org/POM/4.0.0 http://maven.apache.org/xsd/maven-4.0.0.xsd">
    <modelVersion>4.0.0</modelVersion>

    <parent>
        <groupId>com.company</groupId>
        <artifactId>tube</artifactId>
        <version>1.0-SNAPSHOT</version>
    </parent>

    <groupId>com.company</groupId>
    <artifactId>presenter</artifactId>
    <version>1.0-SNAPSHOT</version>
    <packaging>jar</packaging>
</project>
./scheduler/pom.xml
1
2
3
4
5
6
7
8
9
10
11
12
13
14
15
16
17
<?xml version="1.0" encoding="UTF-8"?>
<project xmlns="http://maven.apache.org/POM/4.0.0"
         xmlns:xsi="http://www.w3.org/2001/XMLSchema-instance"
         xsi:schemaLocation="http://maven.apache.org/POM/4.0.0 http://maven.apache.org/xsd/maven-4.0.0.xsd">
    <modelVersion>4.0.0</modelVersion>

    <parent>
        <groupId>com.company</groupId>
        <artifactId>tube</artifactId>
        <version>1.0-SNAPSHOT</version>
    </parent>

    <groupId>com.company</groupId>
    <artifactId>scheduler</artifactId>
    <version>1.0-SNAPSHOT</version>
    <packaging>jar</packaging>
</project>
Dependency management
Now we need our Presenter and Scheduler to be dependent on Library module and Spring Boot.
./presenter/pom.xml
1
2
3
4
5
6
7
8
9
10
11
12
13
14
15
16
<?xml version="1.0" encoding="UTF-8"?>
<project xmlns="http://maven.apache.org/POM/4.0.0"
         xmlns:xsi="http://www.w3.org/2001/XMLSchema-instance"
         xsi:schemaLocation="http://maven.apache.org/POM/4.0.0 http://maven.apache.org/xsd/maven-4.0.0.xsd">
    <modelVersion>4.0.0</modelVersion>

    <!-- ... -->

    <dependencies>
        <dependency>
            <groupId>com.company</groupId>
            <artifactId>library</artifactId>
            <version>1.0-SNAPSHOT</version>
        </dependency>
    </dependencies>
</project>
./scheduler/pom.xml
1
2
3
4
5
6
7
8
9
10
11
12
13
14
15
16
<?xml version="1.0" encoding="UTF-8"?>
<project xmlns="http://maven.apache.org/POM/4.0.0"
         xmlns:xsi="http://www.w3.org/2001/XMLSchema-instance"
         xsi:schemaLocation="http://maven.apache.org/POM/4.0.0 http://maven.apache.org/xsd/maven-4.0.0.xsd">
    <modelVersion>4.0.0</modelVersion>

    <!-- ... -->

    <dependencies>
        <dependency>
            <groupId>com.company</groupId>
            <artifactId>library</artifactId>
            <version>1.0-SNAPSHOT</version>
        </dependency>
    </dependencies>
</project>
Then we’ll just kickstart our whole project under Spring Boot parent. We’re using the latest version here but you can take whichever you want here.
./pom.xml
1
2
3
4
5
6
7
8
9
10
11
12
13
14
15
16
17
18
19
20
21
22
23
24
25
<?xml version="1.0" encoding="UTF-8"?>
<project xmlns="http://maven.apache.org/POM/4.0.0"
         xmlns:xsi="http://www.w3.org/2001/XMLSchema-instance"
         xsi:schemaLocation="http://maven.apache.org/POM/4.0.0 http://maven.apache.org/xsd/maven-4.0.0.xsd">
    <modelVersion>4.0.0</modelVersion>

    <!-- ... -->

    <parent>
        <groupId>org.springframework.boot</groupId>
        <artifactId>spring-boot-starter-parent</artifactId>
        <version>2.0.0.M5</version>
    </parent>

    <repositories>
        <repository>
            <id>spring-milestones</id>
            <name>Spring Milestones</name>
            <url>https://repo.spring.io/libs-milestone</url>
            <snapshots>
                <enabled>false</enabled>
            </snapshots>
        </repository>
    </repositories>
</project>
Now all our modules will be packed with brand new Spring Boot Framework inside.
We also need to accompany our modules with database interaction ability so we include the Spring Boot Data JPA starter module.
./pom.xml
1
2
3
4
5
6
7
8
9
10
11
12
13
14
15
<?xml version="1.0" encoding="UTF-8"?>
<project xmlns="http://maven.apache.org/POM/4.0.0"
         xmlns:xsi="http://www.w3.org/2001/XMLSchema-instance"
         xsi:schemaLocation="http://maven.apache.org/POM/4.0.0 http://maven.apache.org/xsd/maven-4.0.0.xsd">
    <modelVersion>4.0.0</modelVersion>

    <!-- ... -->

    <dependencies>
        <dependency>
            <groupId>org.springframework.boot</groupId>
            <artifactId>spring-boot-starter-data-jpa</artifactId>
        </dependency>
    </dependencies>
</project>
Now we’re ready to get started with database interaction which we’ll cover in next chapter of this guide.
You can find all the sources for this chapter here